Just remember even if you only have 10 minutes to take care of yourself and put yourself first, make it really count. We recommend indulging in this DIY facial once a week to maintain healthy skin until you can return to us at Simply Elegant for a full facial treatment….
In the meantime, if you need any skin care advise please contact us. We would love to hear from you.
So read on and follow these 9 simple steps on how to master a salon-like facial and achieve healthy, radiant skin.
Step 1 – Prep
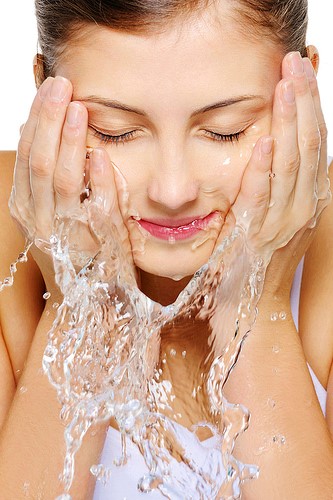
To begin your spa-at-home facial, fill a bowl with warm water and soak some face cloths. Take one face cloth and while it’s warm and damp place over your face for 30 seconds to allow it to loosen any dirt or oil that’s trapped in the skin.
If you are wearing any eye makeup, gently remove this by soaking or spritzing two cotton pads with eye makeup remover then place them over both eyes leaving them for a minute to allow the product to work its magic and remove any stubborn eyeliner or mascara, then gently wipe away ensuring not to drag the delicate skin.
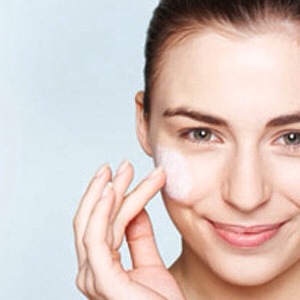
Step 2 – Double cleanse
The benefit of following a deep double cleansing ritual is that it not only removes toxins and impurities, it also primes your pores to better absorb all products to follow, leaving you with a brighter more radiant complexion.
To start the double cleanse, opt for a cleansing oil. The oil in the product attracts the dirt, make-up, and oil on the skin surface literally melting it away. Because it’s water-soluble, when you wash off the cleansing oil you will wash away all the makeup and skin oils. This ensures your second cleanse with your normal cleanser thoroughly cleanse your skin.
Next take your everyday cleanser, or an appropriate cleanser for your specific skin type and cleanse your face for 30 seconds working the product into your skin in light circular motions from top to bottom. We recommend a non-foaming milky or cream cleanser for dry and sensitive skin and a foaming or gel cleanser for oily complexions or for those with acne-prone skin.
Wash off and remove excess cleanser with a facecloth.
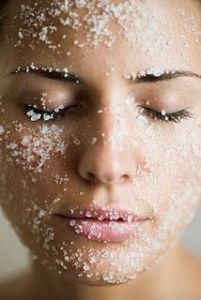
Step 3 – Exfoliate
Next, gently exfoliate your skin for up to 60 seconds. Ensure you use the correct product for your skin type.
Remove exfoliant from skin – you can use one of your warm, damp face cloths or rinse and then pat dry.
Step 4 – Steam
After cleansing and exfoliating, next comes the steam. It helps the pores to open and makes skin further absorbent for the products to follow.
There are several ways you can steam your skin. The simplest involves wetting a facecloth with warm water and placing it on your face and neck for a few minutes.
If you want to skip the steam you can add an extra boost of hydration by spritzing on a Facial Mist. A facial mist with an invigorating scent can help perk up your senses and prep your skin for the rest of your DIY facial experience.
Step 5 – Massage
Don’t overlook the benefits of a massage! While it’s definitely not quite the same doing it on yourself you can still have a lot of fun with it while reaping in the multiple benefits. This step is essential to increase both blood circulation and lymphatic drainage, leading to brighter, healthier skin.
Typically in our salon, your therapist would have a customized ampoule which she would work deeply into your skin to target a specific concern. At home, you can use a massage cream for the face or a face oil. The luxurious oil literally drenches the skin combating dehydration while immersing you in a sea of calm with its amazing scent.
To commence the massage dampen your palms and take a small amount of your chosen product. Starting with the middle of your forehead work the product towards the temples with circular motions. Then massage along the sides of your nose and cheeks. Lastly massage lips, chin, and jawline not forgetting to massage your neck! After 5-10 minutes of massage time, remove any excess product with a warm, damp face cloth or if you’d prefer, wash your face with water.
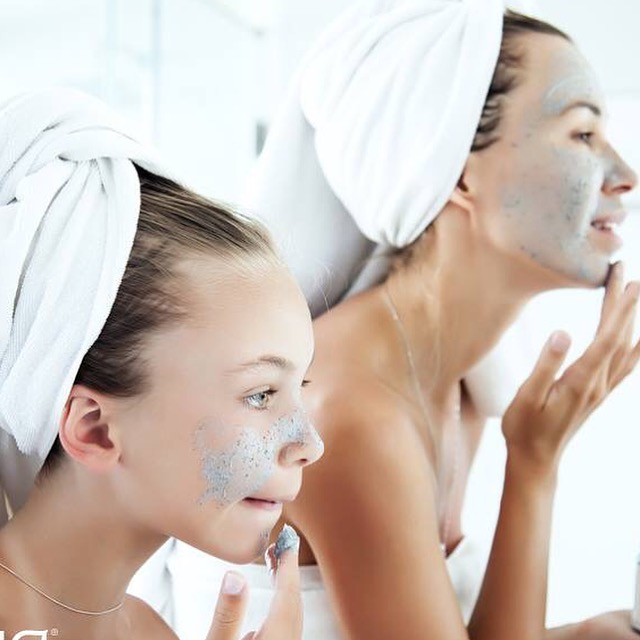
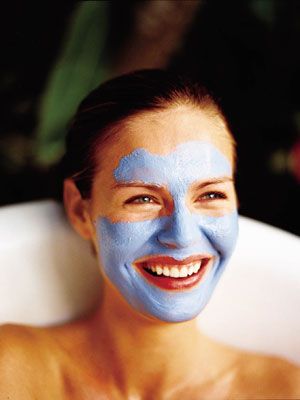
Step 6 – Mask
No facial is complete without a mask! They are a great stand-in if you’re used to getting regular facials as they give your skin an extra nourishing boost with whatever ingredients you feel you need at the moment.
If you want to address more than one skin issue you can use multiple masks, applying them to the different zones of your face. For oily or blemish-prone skin, a mud, clay or charcoal mask will work best as it’ll soak up the extra oil that clogs up your pores. These purifying masks rids skin of toxins and lifts debris out of pores, leaving the complexion smoother and pores minimized.
A good face mask also prepares and primes the skin, expanding pores to allow ingredients to penetrate deeply, so after mask application and removal (use lukewarm water to remove all traces of the facial mask, pat dry), it’s the perfect time to apply your favourite serum and then moisturiser.
Step 7 – Tone
If you haven’t yet incorporated toner into your skin care routine, now is the time. Toning is a very important part of the routine as it helps clean and close the pores as well as brighten the skin and restore its balance.
With a cotton pad, gently apply a toner which is best suited to your skin type all over face and neck, removing any excess face mask.
Step 8 – Serum
Now that your skin is in a more receptive state, you’re going to want to give it a good dose of nourishment by adding a serum into the routine. Apply your chosen serum for your specific needs and let the antioxidants and peptides work its way deep into your skin for immediate skin therapy.
Step 9 – Moisturise
Any skin-pampering session requires replenishment so finish your treatment with moisturiser to seal in all the benefits of your facial!
This last and essential step to your home facial will re-hydrate your skin and retain any moisture loss. Just as your therapist would, choose the perfect moisturiser for your particular needs.
Apply over your face and gently massage, letting it absorb into your skin.
Finish by applying eye cream to the delicate under-eye area. It will visibly reduce dark circles and puffiness as well as fading wrinkles!